

Update 2: Proxmox has added support for adding vTPM devices to a VM with
7.0-13. For more details, check out their docs.
Update: I've discovered a great new Windows 11 MediaCreationTool modification repo on Github. This will download the official Windows 11 ISO from Microsoft and adjust it to allow installation without TPM, SecureBoot, etc. There are a few options for generating the image, including language and Windows edition (Pro/Enterprise/Home) as well as which Windows Version you're coming from. Check it out here: AveYo/MediaCreationTool.bat
Introduction
Windows 11 is here and I'm sure even Linux geeks like me want to give it a spin in a VM! If you've heard anything about Windows 11, however, its that it comes with some onerous restrictions. Your CPU has to be of a certain generation, there needs to be a TPM chip available, SecureBoot, etc. At the moment the latest Proxmox (7.0) does not have support for emulating a TPM chip, but the pve-devel mailing list has some promising chatter from back in July 2021 (Source). So, for now we've got to find a way around these Windows 11 installer checks.
There are some workarounds / Powershell scripts floating around on the internet if you're going the route of upgrading from a Windows 10 installation. However, if you're simply using a Windows 11 ISO you won't be able to adjust the installer app beforehand. That's where this method comes in!
Getting Started
First things first - the Windows 11 ISO can be downloaded here. Scroll down a bit past the "Windows 11 Installation Assistant" and the "Create Windows 11 Installation Media" sections, until you find the "Download Windows 11 Disk Image (ISO)" section. There you can select the language and get the 5.2gb ISO 🤯. Once you've got that downloaded locally, upload it to the disk images section of your Proxmox host and start the "Create VM" wizard.
At this point I made sure to select the OVMF (UEFI) BIOS type and everything else I left to the standard Windows VM settings. You're going to want at least 4gb of RAM and 64gb of disk. Also make sure to either not setup a network device yet or check the "disconnect" check box on your network interface. This is important for allowing Windows 11 to be setup with a local account only. Otherwise they will force you to login with a Microsoft account during the first-boot wizard. Finally, select the Win 11 ISO as your virtual disk device and start the VM!
If you now attempt to go through the installation as normal, you'll get through the first step of selecting "I don't have a product key", selecting your edition of Windows (i.e. Windows 11 Professional) and then it will tell you "Your computer cannot run Windows 11, see the website for details..".
Workaround
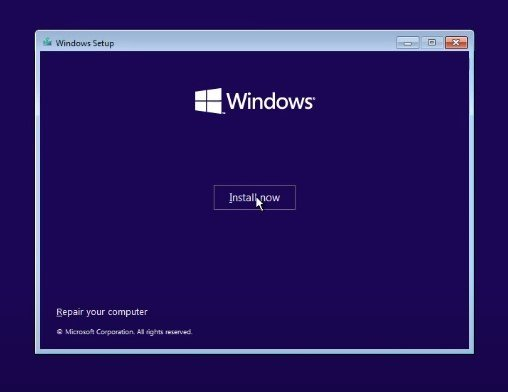
To avoid this issue we'll have to create some registry entries in this "live" Windows environment. Therefore, exit the installer Window so that it brings you back to the initial purple screen with the two buttons - "Install" and "Repair Computer".
Select "Repair Computer", then "Troubleshoot" and finally "Command Prompt". Now that we have access to a windows admin shell theres pretty much nothing we can't do!
regedit.exe
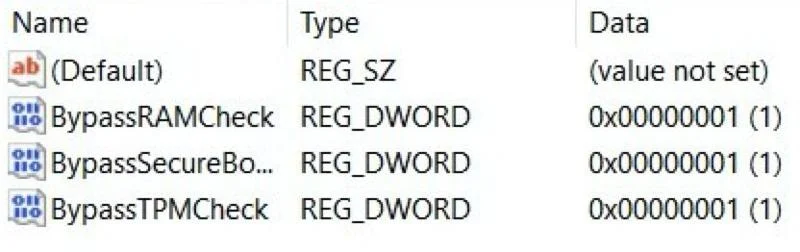
First, open the Registry Editor by entering regedit.exe in the command prompt. Navigate to HKEY_LOCAL_MACHINE\SYSTEM\Setup. There we need to create a new key or directory called LabConfig. Inside LabConfig create 3 new DWORD entries by right-clicking and selecting "New" -> "DWORD".
BypassTPMCheck:1BypassRAMCheck:1BypassSecureBootCheck:1
Your LabConfig key should look like this.
Now you we can exit regedit and return to the command prompt. If we tried to back out of the "Repair Computer" area and return to the installer, we won't be able to go back further than the light blue screen with the selection "Troubleshoot" or "Reboot". Unfortunately at this point you can't get back to the dark purple initial installer application that way. Fortunately for us, however, the installer application has an extremely easy to guess binary name which is in the $PATH of our command prompt!
Therefore, back in our command prompt you can enter setup.exe and you'll launch the fullscreen Windows 11 dark purple installer again. This time, after selecting "I don't have a product key" and choosing your Windows 11 edition, the install wizard will continue without a word and allow you to partition your disk, etc.!

And that is all that there is to it! Now how do you disable that center justified taskbar.. 🤔😂