
Update: CSS is getting a native @scroll-timeline that will make this much easier! See Kevin Powell and Adam Argyle work with it in Chrome Canary here. You can also check out the CSS Spec for scroll-linked animation.
It's that time of year again where I decided to rewrite my personal website 🎉
This year I decided to grab the tools I love and know best instead of trying something new just because. That stack consists of Next.js and TailwindCSS! I won't go into too much more detail about the rest of the rewrite itself as its a relatively standard blog type portfolio site. But, I did want to share one particular feature I'm very happy to have gotten working with (mostly) just Tailwind and a bit of Javascript!
And that feature is the read progress bar! You know the ones, they are fixed to the top of the page and indicate to the user how far they have scrolled through total available page height.
Implementation
Lets just take a look at the markup and Tailwind classes first.
The important stuff is happening on the first line here. You'll see that all I'm defining is the bg-gradient-to-r in order to set the background-image to a linear-gradient, and two ring colors. The rest of the classes generate the line itself and keep it fixed to the top of the viewport.
const ProgressBar = () => {
  return (
    <div
      id="scroll-progress"
      className="
        fixed top-0 left-0
        z-50 h-2
        w-full bg-gradient-to-r p-0 ring-pink-300 ring-opacity-75 dark:ring-palevioletred dark:ring-opacity-75
      "
    />
  )
}

export default ProgressBar
Now lets dig into some of the logic.. I'm using react-use for their wonderful set of hooks, in this case we're using useWindowScroll to get the current scroll position. I'm also calculating the page height, we'll need this for our calculation later on.
Finally, theres a useEffect which has only the y window scroll position and pageHeight as dependencies. We use these two values to calculate the current percentScrolled value to determine how far the user is down the page, and therefore how far across the progress bar should be!
import { useWindowScroll } from "react-use"
import { useEffect } from "react"

const ProgressBar = () => {
  const { y } = useWindowScroll()
  const pageHeight = document.body.scrollHeight - window.innerHeight

  useEffect(() => {
    const percentScrolled = (Math.abs(y) / pageHeight) * 100
    const el = document.getElementById("scroll-progress")
  }, [y, pageHeight])
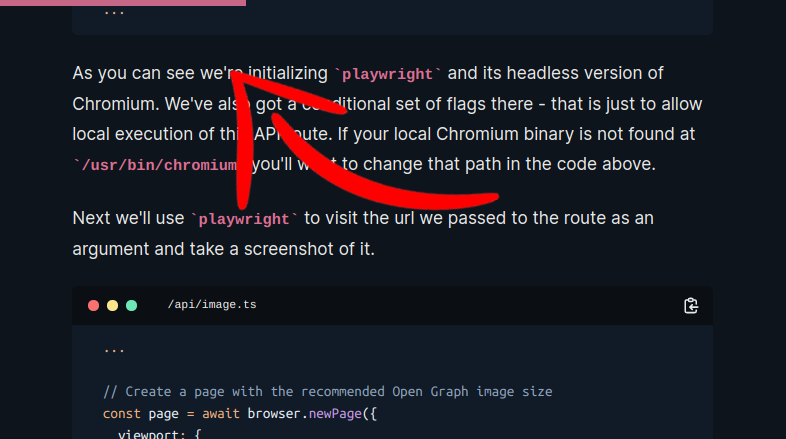
Now we come to the interesting part!
After calculating the percentage scrolled percent, we should be able to just insert that value somewhere and call it a day, right? Wrong.
Tailwind's linear gradients are fairly flexible, but if used as intended, they will generate a fade out affect. We're looking to create a hard stop at the end of the progress bar. I tried to use their built-in to-transparent, however it does not contain the critical 0 css gradient stop value, causing the selected color to transition out slowly, as gradients tend to do.. 😂
Fortunately Tailwind makes liberal use of CSS custom properties, and there is one that we can piggy back on and overwrite in order to "fix" the gradient hard stop problem. That's the tw-gradient-stops custom property in the bg-gradient-to-r class.
// bg-gradient-to-r
background-image: linear-gradient(to right, var(--tw-gradient-stops));
By setting the tw-gradient-stops custom property ourselves, we can set a stop point of the bar to the percentage scrolled, and the second stop to transparent 0. This will allow us to achieve the effect of having a sharp edge along the progress bar as it moves across the screen. Our "new" bg-gradient-to-r will look like this.
// bg-gradient-to-r
background-image: linear-gradient(
  to right,
  var(--tw-ring-color) ${percentScrolled}%,
  transparent 0
);
Thanks to useEffect and the percentScrolled string interpolation this percentage scrolled value is updated constantly as the user scrolls, generating our desired progress bar along the top of the screen!
import { useWindowScroll } from "react-use"
import { useEffect } from "react"

const ProgressBar = () => {
  const { y } = useWindowScroll()
  const pageHeight = document.body.scrollHeight - window.innerHeight

  useEffect(() => {
    const percentScrolled = (Math.abs(y) / pageHeight) * 100
    const el = document.getElementById("scroll-progress")
    el?.style.setProperty(
      "--tw-gradient-stops",
      `var(--tw-ring-color) ${percentScrolled}%, transparent 0`,
    )
  }, [y, pageHeight])

  return (
    <div
      id="scroll-progress"
      className="
        fixed top-0 left-0
        z-50 h-2
        w-full bg-gradient-to-r p-0 ring-pink-300 ring-opacity-75 dark:ring-palevioletred dark:ring-opacity-75
      "
    />
  )
}

export default ProgressBar
Finally, some of you may be wondering if I'd ever mention those ring-colors again, while others have probably figured it out already. The ring colors simply provided an easy Tailwind custom property to hijack in order to be able to define different colors for the bar via Tailwind classes as well. This makes it easy to dynamically adjust the bar's color based on the prefered light/dark theme. We can also fine tune the style of the bar with any of the other ring classes. In this case, I've adjusted the opacity of the bar with the ring-opacity-75 class.
I hope you've had fun reading this and maybe even learned a thing or two, I know I did working through it!