
This post will be mostly documentation for myself, but I also want to share with the world my setup for my personal media server.
Preparation
The inventory for this project is as follows:
- 1x Bare Metal Server in Frankfurt
- 1x VPS in Ukraine
My goal is to run the VPS as a 24/7 torrent box, and the baremetal server will then be the plex / storage server.
For torrents themselves, I plan to continue to use qBittorrent, with which I've had good experience with in the past.
For managing TV shows I'm partial to Sickrage /
DNS
Before we get to setting up the servers, lets create some DNS entries and point them at the right host.
I use cloudflare for all my DNS management, but the steps will be similiar for most any provider.
We need to create a few subdomains for the services we are about to setup, the names can obviously be changed, this is just how I like naming things.
Go to your DNS overview, click "Create" and make the following subdomains:
qbittorrent.domain.tld- for qBittorrentcouchpotato.domain.tld- for Couchpotatosickchill.domain.tld- for Sickchillplex.domain.tld- for Plex
qbittorrent, couchpotato, and sickchill will all point to our torrent box (rented VPS), and plex will point to our bare metal server.
Server 1
Prerequisites
Let's get started with the VPS. This is a brand new Ubuntu 20.04 installation, so well begin by updating and installing some necessary packages.
sudo apt update && sudo apt upgrade -y
sudo apt install -y vim git net-tools nginx \
  certbot python3-certbot-nginx python2 \
  software-properties-common python-pip-whl
Once we have those, we can get started with the tools. This box will need the following:
First things first, we'll create a user/group for all of these applications to run under
sudo useradd media -g media -u 420 -s /usr/sbin/nologin -Um
This command does a few things for us, first it creates the user
mediawith the GUID 420, then it creates a group with the same name, creates a home directory for it at/home/mediaand sets the default shell to/usr/sbin/nologinso one cannot login with it - its for application use only.
Next, lets setup some directories for the ongoing and completed downloads:
sudo mkdir -p /opt/{downloads,media}/{tv,movies}
sudo chown -R media: /opt/media
sudo chown -R media: /opt/downloads
Now we can begin installing stuff!
qBittorrent
There is a version of the headless qBittorrent package in the Ubuntu repos, but its pretty old. So we'll be adding the PPA from qbittorrent themselves.
sudo add-apt-repository ppa:qbittorrent-team/qbittorrent-stable
sudo apt update && sudo apt install -y qbittorrent-nox
Then we must setup a systemd unit file for this,
sudo vim /etc/systemd/system/qbittorrent.service
And copy the following contents in:
[Unit]
Description=qBittorrent Command Line Client
After=network.target

[Service]
Type=forking
User=media
Group=media
UMask=0002
ExecStart=/usr/bin/qbittorrent-nox -d
Restart=on-failure

[Install]
WantedBy=multi-user.target
Close vim, and activate this systemd service.
sudo systemctl daemon-reload
sudo systemctl enable qbittorrent
sudo systemctl start qbittorrent
If you get any errors starting it, you can troubleshoot the systemd process with the following command
sudo journalctl -xeu qbittorrent
Now qBittorrent should be running on port 8080.
You can run
netstat -tlpnto view all open TCP ports to confirm this.
Finally we need to setup the reverse proxy nginx config for this application.
I like to do the certificate first so I don't have to fiddle around with nginx beforehand. To run certbot in standalone mode though, it needs to spin up its own temporary web server, so we need to stop nginx so the ports aren't blocked.
sudo systemctl stop nginx
sudo certbot certonly --standalone -d dl.host.tld -d movies.host.tld -d tv.host.tld
sudo systemctl start nginx
Now we have certificates for our application(s) domains. Make a note of which folder they got saved in exactly. It is usually under: /etc/letsencrypt/live/..., we will need it in the next steps for the nginx config.
sudo vim /etc/nginx/conf.d/qbittorrent.conf
Copy in the following and make sure to change qbittorrent.domain.tld to the domain you chose! This config is relatively simple, we're just reverse proxying port 8080, on which qBittorrent is running, out to the internet under the domain qbittorrent.domain.tld.
server {
  listen 80;
  server_name qbittorrent.domain.tld;

  return 301 https://qbittorrent.domain.tld$request_uri;
}

server {

  listen 443 ssl http2; # managed by Certbot
  server_name qbittorrent.domain.tld;

  location /{
    proxy_pass http://127.0.0.1:8080;
    proxy_set_header Host $host;
    proxy_set_header X-Real-IP $remote_addr;
    proxy_set_header X-Forwarded-For $proxy_add_x_forwarded_for;
  }

  error_page 404 /404.html;
  location = /404.html {
    root /var/www/html/404;
    # internal;
  }

  ssl_certificate /etc/letsencrypt/live/qbittorrent.domain.tld/fullchain.pem; # managed by Certbot
  ssl_certificate_key /etc/letsencrypt/live/qbittorrent.domain.tld/privkey.pem; # managed by Certbot
  include /etc/letsencrypt/options-ssl-nginx.conf; # managed by Certbot
  ssl_dhparam /etc/letsencrypt/ssl-dhparams.pem; # managed by Certbot
}
Finally, close vim and run sudo nginx -t to lint the config, and sudo nginx -s reload to reload the nginx and pick up the new config. Now your qBittorrent instance should be available at the URL of your chosing!
Go to the URL you've chosen and login with the default credentials:
Username: admin
Password: adminadmin
You should definitely change that first under Tools -> Options -> Web UI.
Then in the Downloads tab of the settings, change the Default Save Path to: /opt/media/ and the Keep incomplete torrents in: option to: /opt/downloads.
Next, close the settings window and in the left hand column menu, right click on Categories and select Add new Category. Here we will add predefined categories for Movies and TV with their respective default save locations, /opt/media/movies and /opt/media/tv. Our other applications, couchpotato and sickchill, will add them to qbittorrent with the category applied and then qbittorrent will know where to save the files.
Sickchill
This application is installed by simply cloning their repo. So we will clone this into /opt/SickChill by doing the following
cd /opt
sudo git clone https://github.com/SickChill/SickChill.git
sudo chown -R media: /opt/SickChill
Then we can setup a systemd service file for it.
sudo vim /etc/systemd/system/sickchill.service
And copy the following into it:
[Unit]
Description=SickChill Daemon

[Service]
User=media
Group=media
Type=forking
GuessMainPID=no
ExecStart=/usr/bin/python2 /opt/SickChill/SickBeard.py -q --daemon --nolaunch --datadir=/opt/SickChill

[Install]
WantedBy=multi-user.target
And don't forget to enable the systemd service.
sudo systemctl daemon-reload
sudo systemctl enable sickchill
sudo systemctl start sickchill
If you get any errors starting it, you can troubleshoot the systemd process with the following command
sudo journalctl -xeu sickchill
If everything went smoothly, we should have this service running on port 8081 now. Again, you can use netstat -tlpn to confirm this.
We now need to setup the nginx config file for sickchill as well. Remember in the previous section for qBittorrent, we used certbot to request a certificate for sickchill.domain.tld already, therefore we can skip that step this time and simply apply the preexisting cert here.
So open up a new nginx config
sudo vim /etc/nginx/conf.d/sickchill.conf
And paste in the following:
server {
  listen 80;
  server_name sickchill.domain.tld;

  return 301 https://sickchill.domain.tld$request_uri;
}

server {

  listen 443 ssl http2; # managed by Certbot
  server_name sickchill.domain.tld;

  location /{
    proxy_pass http://127.0.0.1:8081;
    proxy_set_header Host $host;
    proxy_set_header X-Real-IP $remote_addr;
    proxy_set_header X-Forwarded-For $proxy_add_x_forwarded_for;
  }

  error_page 404 /404.html;
  location = /404.html {
    root /var/www/html/404;
    # internal;
  }

  ssl_certificate /etc/letsencrypt/live/qbittorrent.domain.tld/fullchain.pem; # managed by Certbot
  ssl_certificate_key /etc/letsencrypt/live/qbittorrent.domain.tld/privkey.pem; # managed by Certbot
  include /etc/letsencrypt/options-ssl-nginx.conf; # managed by Certbot
  ssl_dhparam /etc/letsencrypt/ssl-dhparams.pem; # managed by Certbot
}
Don't forget to swap out
sickchill.domain.tldfor your chosen sickchill.domain.
Now, visit your chosen URL and login with the default credentials:
Username: sickchill
Password: sickchill
Again, this should immediately be updated in the options (gear icon top right) under General.
While we're in the settings, go to Search Settings and select the tab Torrent Search.
Here we can create the connection to qBittorrent.
So under Send torrents to: select qBittorrent APIv2.
Torrent host:port should be localhost:8080.
Client username and Client password are the web login credentials you selected when setting up qBittorrent earlier.
And finally, the Add label to torrent is the TV category we created in qBittorrent earlier.
After that is all entered, you can select Test Connection at the bottom of this form to confirm everything is working.
There are a few other settings you should adjust in Sickchill, but I won't go over them here. They are personal settings such as which torrent provider you want to use, what post processing settings you want like file naming format, etc. You can set this up however you like, just make sure the files are being saved to /opt/media/tv!
Couchpotato
Last, but not least - Couchpotato. This is also simply a matter of cloning their repository:
cd /opt
sudo git clone https://github.com/CouchPotato/CouchPotatoServer.git couchpotato
sudo chown -R media: couchpotato
We also have to install PyOpenSSL,
pip install --upgrade pyopenssl
If
pipis not installed, you can install it viasudo apt install python3-pipor manually from pypa.io's script:cd ~/ && wget https://bootstrap.pypa.io/get-pip.py && python get-pip.py
Next, lets setup a systemd service file for couchpotato as well.
sudo vim /etc/systemd/system/couchpotato.service
And paste in the following:
[Unit]
Description=CouchPotato application instance
After=network.target

[Service]
ExecStart=/opt/couchpotato/CouchPotato.py
Type=simple
User=media
Group=media
Restart=always
RestartSec=2s

[Install]
WantedBy=multi-user.target
Then enable it as well.
sudo systemctl daemon-reload
sudo systemctl enable couchpotato
sudo systemctl start couchpotato
sudo systemctl status couchpotato
If all went well, you should now also have couchpotato running on port 5050.
Now we need to setup the nginx config for couchpotato.
sudo vim /etc/nginx/conf.d/couchpotato.conf
Copy in the following:
server {
  listen 80;
  server_name couchpotato.domain.tld;

  return 301 https://couchpotato.domain.tld$request_uri;
}

server {
  listen 443 ssl http2; # managed by Certbot
  server_name couchpotato.domain.tld;

  location / {
    proxy_pass http://127.0.0.1:5050;
    proxy_set_header Host $host;
    proxy_set_header X-Real-IP $remote_addr;
    proxy_set_header X-Forwarded-For $proxy_add_x_forwarded_for;
  }

  error_page 404 /404.html;
  location = /404.html {
    root /var/www/html/404;
    # internal;
  }

  ssl_certificate /etc/letsencrypt/live/qbittorrent.domain.tld/fullchain.pem; # managed by Certbot
  ssl_certificate_key /etc/letsencrypt/live/qbittorrent.domain.tld/privkey.pem; # managed by Certbot
  include /etc/letsencrypt/options-ssl-nginx.conf; # managed by Certbot
  ssl_dhparam /etc/letsencrypt/ssl-dhparams.pem; # managed by Certbot
}
Once this is in place, we can let nginx check its configs again and reload it, sudo nginx -t and sudo nginx -s reload.
Now when we visit our domain, we are greeted with the Couchpotato setup wizard. The most important sections are setting a username / password, and setting up the qBittorrent connection.
Under the section Downloaders, check the box next to qBittorrent and enter the following details:
Host: http://127.0.0.1:8080
Username: selected Username
Password: selected Password
Torrent Label: movies
Once that is up and running we can finally take a breather, grab a coffee, maybe a smoke - because we're 90% of the way finished!
We just need to get the media to our bare-metal server now for long-term storage and playback.
Server 2
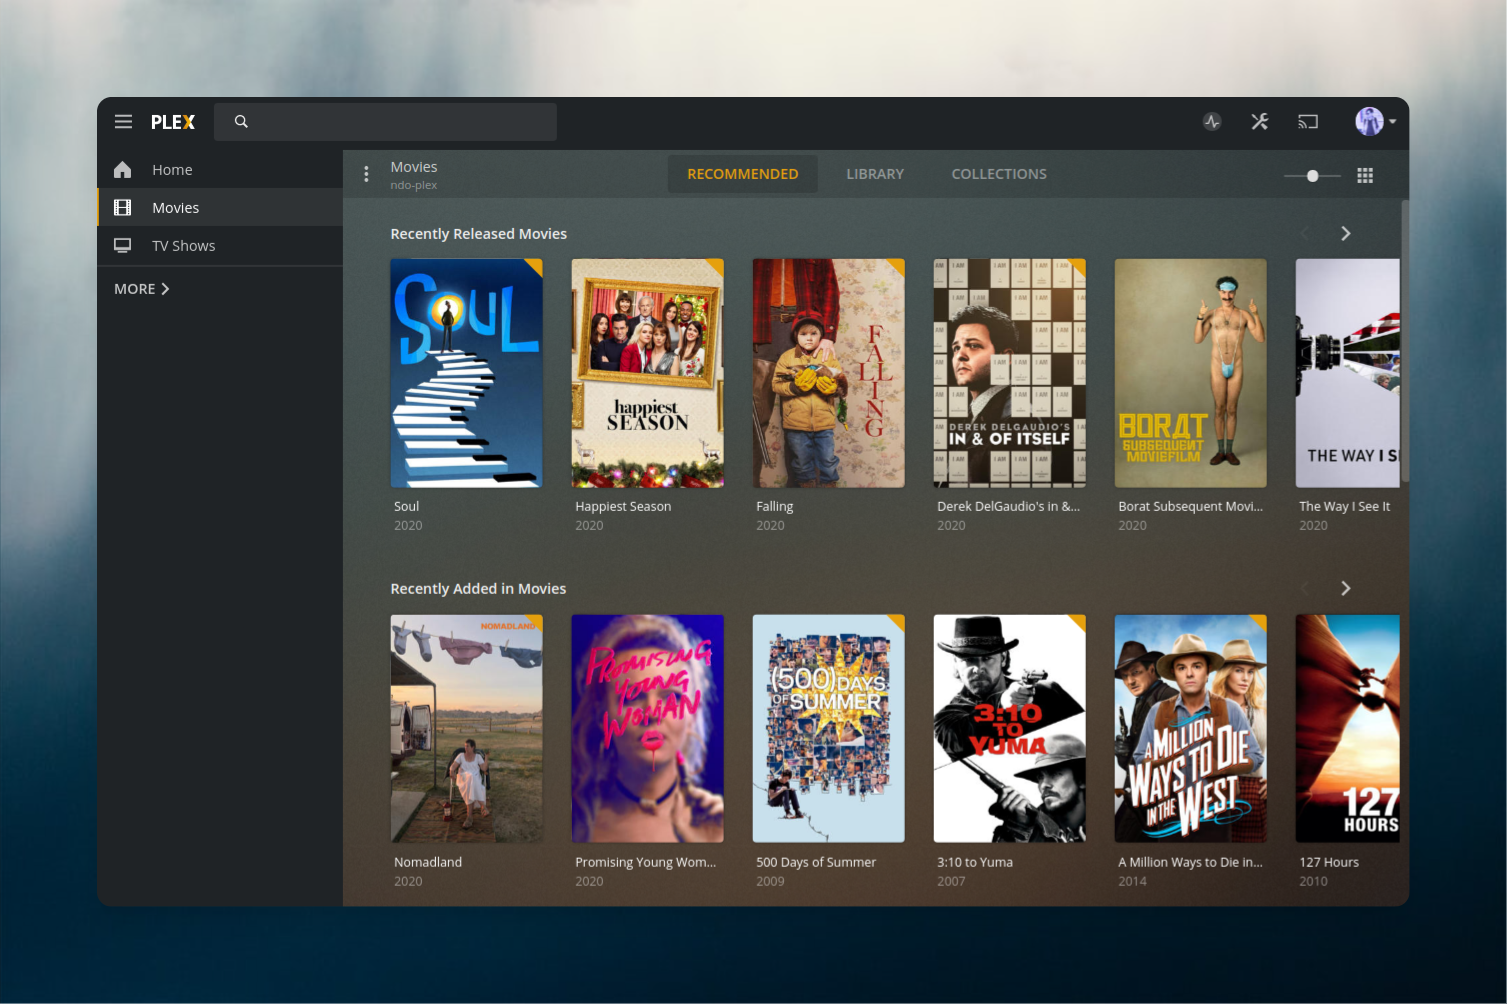
This is our bare-metal server which we will use to store the media long-term and run Plex for all our media consumption wants/needs!
So we'll begin by installing Plex. There are many ways to do this, but I'm partial to using a little Github project called mrworf/plexupdate which is just a bash script to not only automatically install, but also keep up-to-date a Plex installation.
So SSH into your new box, and execute the following:
bash -c "$(wget -qO - https://raw.githubusercontent.com/mrworf/plexupdate/master/extras/installer.sh)"
After this is done, you should have Plex running on port 32400 and a systemd unit file called plexmediaserver. This means you can stop/restart Plex via sudo systemctl restart plexmediaserver or check the status / logs via sudo journalctl -xeu plexmediaserver.
Now we'll want to install nginx and certbot on this server as well to grab an SSL cert and reverse proxy Plex out to the internet.
sudo apt install -y vim git net-tools nginx certbot python3-certbot-nginx software-properties-common python-pip-whl
Now we'll grab the SSL certificate for our plex.domain.tld domain.
sudo certbot certonly --standalone -d plex.domain.tld
Then lets create the nginx config file for Plex:
sudo vim /etc/nginx/conf.d/plex.conf
And paste in the following:
server {
  listen 80;
  server_name plex.domain.tld;

  return 301 https://plex.domain.tld$request_uri;
}

server {
  listen 443 ssl http2;
  server_name plex.domain.tld;

  location / {
    proxy_pass http://127.0.0.1:32400;
    proxy_set_header Host $host;
    proxy_set_header X-Real-IP $remote_addr;
    proxy_set_header X-Forwarded-For $proxy_add_x_forwarded_for;

    #upgrade to WebSocket protocol when requested
    proxy_set_header Upgrade $http_upgrade;
    proxy_set_header Connection "Upgrade";
  }

  error_page 404 /404.html;
  location = /404.html {
    root /var/www/html/404;
    # internal;
  }

  error_log /var/log/nginx/plex.error.log info;

  ssl_certificate /etc/letsencrypt/live/plex.domain.tld/fullchain.pem; # managed by Certbot
  ssl_certificate_key /etc/letsencrypt/live/plex.domain.tld/privkey.pem; # managed by Certbot
  include /etc/letsencrypt/options-ssl-nginx.conf; # managed by Certbot
  ssl_dhparam /etc/letsencrypt/ssl-dhparams.pem; # managed by Certbot
}
Save and exit vim, and reload nginx to pick up the config file.
sudo nginx -t
sudo nginx -s reload
Now you can visit your chosen plex.domain.tld domain and go through the Plex setup wizard!
Break
Now lets take a quick break and go over what we've done, and what still needs to be done.
We have our VPS / torrent box running with qBittorrent, Sickchill, and Couchpotato which will be downloading tv and movies. We also have our long-term storage / media player box running Plex from which we can stream all that media.
The only thing missing now is an automated way to get newly downloaded media from one server to the next.
Media Transfer
I saved this part for last, because this is just a custom bash script I use to run automatically by Sickchill / Couchpotato after downloads are complete and post processing has been run. It just rsync's the media from the one server over to the other.
TO BE CONTINUED...