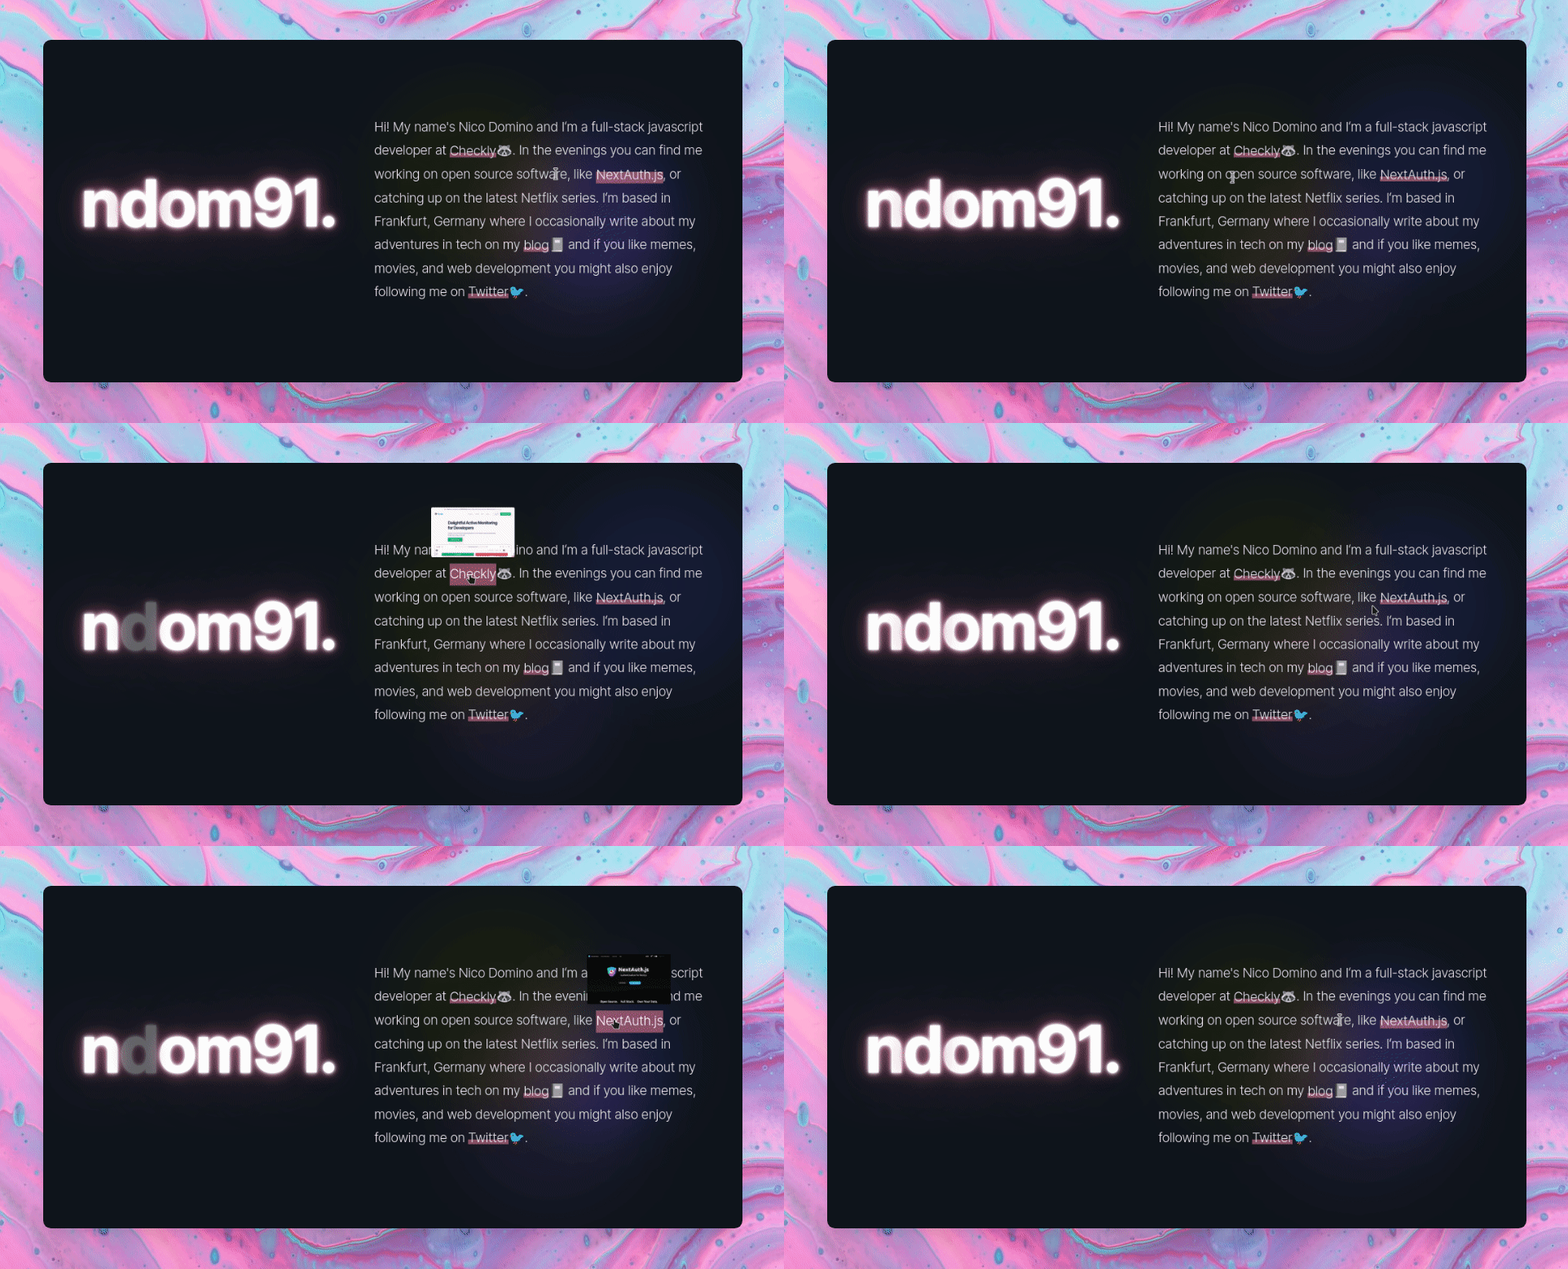
I stumbled upon 

Before I go into much further detail here, you can save yourself a bunch of work and use 
If you're still interested in doing this yourself, lets move on!
This whole process consists of two primary parts:
- Next.js API Route
- React Component
API Route Setup
First, lets setup the API Route to render these images and return them to the client. Initially, I figured, "Oh this will be easy, just snap the screenshot with Puppeteer / Playwright!". We'll see about that.. 😂
The first things we will need are two packages from npm.
npm install playwright-core chrome-aws-lambda
The first is playwright, a browser automation library from Microsoft with which you can control a headless versions of Chrome, Firefox, etc. We will be using the core version which does not ship with the Chromium binary in order to save space. Next is chrome-aws-lambda which is the missing Chromium binary specifically designed to run on AWS Lambda.
When trying to deploy a standard Next.js API route with these dependencies, you will run into the first odd bug. Vercel / AWS only allow functions up to 50mb. However, we specifically installed the chrome-aws-lambda and playwright-core variants to save space, which should have come in under this limit. It turns out that due to some dependency sharing / bundling optimizations that are over my head, the function size still exceeds 50mb. (See: https://github.com/vercel/vercel/issues/4739).
The workaround for this is to move the Next.js API route's directory out of its normal position (/src/pages/api) into the root of the project (/src/api or /api) to avoid the build dependency sharing optimization. This will, however, break the Next.js dev server's ability to serve the API routes. Luckily, we can use the Vercel cli instead during development.
Add a new npm script, for example dev:local and set it to vercel dev. You may not overwrite the default Next.js dev npm script (next dev) because the vercel cli depends upon it.
Now that we have all of the workarounds and dependencies out of the way, we can finally get to some code!
/api/image.ts
Create a new API route in our non-standard directory, for example /api/image.ts. Here we will import our two dependencies and setup the API route boilerplate.
import type { NextApiRequest, NextApiResponse } from "next"
import chromium from "chrome-aws-lambda"
import playwright from "playwright-core"

export default async (req: NextApiRequest, res: NextApiResponse) => {
  // Start Playwright with the dynamic chrome-aws-lambda args
  const browser = await playwright.chromium.launch({
    args: chromium.args,
    executablePath:
      process.env.NODE_ENV !== "development"
        ? await chromium.executablePath
        : "/usr/bin/chromium",
    headless: process.env.NODE_ENV !== "development" ? chromium.headless : true,
  })
As you can see we're initializing playwright and its headless version of Chromium. We've also got a conditional set of flags there - that is just to allow local execution of this API route. If your local Chromium binary is not found at /usr/bin/chromium you'll want to change that path in the code above.
Next we'll use playwright to visit the url we passed to the route as an argument and take a screenshot of it.
  // Create a page with the recommended Open Graph image size
  const page = await browser.newPage({
    viewport: {
      width: 1200,
      height: 720,
    },
  })

  // Extract the url from the query parameter `path`
  const url = req.query.path as string

  await page.goto(url)

  const data = await page.screenshot({
    type: "png",
  })

  await browser.close()
As you can see, we're grabbing the URL query parameter via req.query.path and passing it to page.goto(). Finally, towards the bottom here we're taking the screenshot via page.screenshot(). And thats really the meat of it! Everything else is plumbing to get the arguments and image data around, etc.
The final part of this API route is returning the image data and setting some cache headers. You can also add similar max-age headers to your vercel.json config file to enable caching at the client (browser) level.
  // Set the `s-maxage` property to cache at the CDN layer
  res.setHeader("Cache-Control", "s-maxage=31536000, public")
  res.setHeader("Content-Type", "image/png")
  res.end(data)
}
Here you can see we're setting some cache headers, s-maxage to allow CDN's and proxies (i.e. Vercel Edge) to cache the image, as well as max-age for the client's browser cache to also cache the image. Finally we're also appending stale-while-revalidate so that if the cache has an image, it will be served, but in the background a fresh copy will still be generated. Who knows how often these URL's we will be linking to are updated and I'd prefer to have both an aggressive caching strategy in addition to fresh content.
Finally, we're setting the correct Content-Type header and returning the image blob.
Now that the request has been served, we can continue on to receiving and displaying it in the React component!
BONUS: You can also pass along the light/dark state of your own website to the website you're screenshotting to make the links more dynamic and accurate! This is a two line addition to the above API route code. Directly below the line where we grabbed the path query parameter, add the following:
// Pass current color-scheme to headless chrome
const colorScheme = req.query.colorScheme as
  | "light"
  | "dark"
  | "no-preference"
  | null

await page.emulateMedia({ colorScheme })
Click for full /api/image.ts file.
import type { NextApiRequest, NextApiResponse } from "next"
import chromium from "chrome-aws-lambda"
import playwright from "playwright-core"

export default async (req: NextApiRequest, res: NextApiResponse) => {
  // Start Playwright with the dynamic chrome-aws-lambda args
  const browser = await playwright.chromium.launch({
    args: chromium.args,
    executablePath:
      process.env.NODE_ENV !== "development"
        ? await chromium.executablePath
        : "/usr/bin/chromium",
    headless: process.env.NODE_ENV !== "development" ? chromium.headless : true,
  })

  // Create a page with the recommended Open Graph image size
  const page = await browser.newPage({
    viewport: {
      width: 1200,
      height: 720,
    },
  })

  // Extract the url from the query parameter `path`
  const url = req.query.path as string

  // Pass current color-scheme to headless chrome
  const colorScheme = req.query.colorScheme as
    | "light"
    | "dark"
    | "no-preference"
    | null

  await page.emulateMedia({ colorScheme })

  await page.goto(url)

  const data = await page.screenshot({
    type: "png",
  })

  await browser.close()

  // Set the `s-maxage` property to cache at the CDN layer
  res.setHeader("Cache-Control", "s-maxage=31536000, public")
  res.setHeader("Content-Type", "image/png")
  res.end(data)
}
/src/components/screenshot-link.tsx
This component will be responsible only for fetching and displaying these images above a link, so it will consist of two parts, the text to be displayed, and an image that needs to be animated or transitioned into view.
import { useState } from "react"
import Image from "next/image"

type Props = {
  url: string
  text: string
}

const ScreenshotLink = ({ url, text }: Props) => {
  const [isHovering, setIsHovering] = useState(false)
  const [linkScreenshot, setLinkScreenshot] = useState("")

  const fetchImage = async (url: string) => {
    let colorScheme: "light" | "dark" = "light"
    if (typeof document !== "undefined") {
      colorScheme = document.documentElement.classList.contains("dark")
        ? "dark"
        : "light"
    }
    try {
      const res = await fetch(
        `/api/image?path=${encodeURIComponent(url)}&colorScheme=${colorScheme}`
      )
      const image = await res.blob()
      setLinkScreenshot(URL.createObjectURL(image))
      setIsHovering(true)
    } catch (e) {
      console.error(e)
    }
  }
Lets begin with the logic of the component. Here we're defining two props, url and text, which will be as you can probably guess.. the URL and text of the link we're going to render! We also have two state variables, the linkScreenshot and the boolean isHovering.
Then we have an asynchronous function named fetchImage which takes the URL to be screenshotted as an argument. We also read the current status of our page's light/dark status here shortly before calling our API route, and finally we append both of these variables as query parameters to end of our fetch call and await the result. We then need to run the result through fetch's .blob() response helper function which will give us the image blog we can create a URL out of. We can use URL.createObjectUrl() to create a local blob:... URL for our image, which we can happily pass to the new next/image component via our linkScreenshot state variable! Once we have the image blob URL, we can set our isHovering boolean to true as well.
So to summarize briefly,
- We're fetching the image from the API route we created earlier.
- From that blob we can create a
blob:..ObjectURL. - Next, we're passing that to
next/imageto display. - Finally, we set
isHoveringtotrue.
Markup
So with the logic out of the way, let's look at the markup of this LinkScreenshot component.
  return (
    <div
      className="relative inline-block"
      onMouseOver={() => fetchImage(url)}
      onMouseOut={() => setIsHovering(false)}
    >
      {isHovering && linkScreenshot && (
        <div className="absolute z-10 block w-32 pointer-events-none right-1/2 lg:block bottom-[2.0rem] animate-fade_in_up">
          <Image
            src={linkScreenshot}
            height={180}
            width={300}
            unoptimized
            alt={text}
            className="rounded-sm"
          />
        </div>
      )}
      <a
        href={url}
        target="_blank"
        rel="noopener noreferrer"
        className="transition-all border-underline-grow dark:ring-palevioletred"
      >
        {text}
      </a>
    </div>
  )
}

export default ScreenshotLink
This part is relatively straight forward, the most important part is the onMouseOver event handler on the container div of the whole component. This will execute the fetching of the image and all the subsequent events whenever a user hovers our link text.
As you can see, we're also only displaying the next/image element once we both have a linkScreenshot and isHovering is true. Otherwise we might display the image element early and get one of those super ugly image failed placeholder icons with the alt text next to it.
The image container div also has a custom class named animate-fade_in_up which is simply a custom animation defined in my tailwind.config.js which fades in the image nice and smoothly and looks like this:
"fade_in_up_5": {
  "0%": {
    opacity: "0",
    transform: "translateX(50%) translateY(20px)",
  },
  "100%": {
    opacity: "1",
    transform: "translateX(50%) translateY(0)",
  },
},
Click for full /src/components/ScreenshotLink.ts file.
import { useState } from "react"
import Image from "next/image"

type Props = {
  url: string
  text: string
}

const ScreenshotLink = ({ url, text }: Props) => {
  const [isHovering, setIsHovering] = useState(false)
  const [linkScreenshot, setLinkScreenshot] = useState("")

  const fetchImage = async (url: string) => {
    let colorScheme: "light" | "dark" = "light"
    if (typeof document !== "undefined") {
      colorScheme = document.documentElement.classList.contains("dark")
        ? "dark"
        : "light"
    }
    try {
      const res = await fetch(
        `/api/image?path=${encodeURIComponent(url)}&colorScheme=${colorScheme}`
      )
      const image = await res.blob()
      setLinkScreenshot(URL.createObjectURL(image))
      setIsHovering(true)
    } catch (e) {
      console.error(e)
    }
  }

  return (
    <div
      className="relative inline-block"
      onMouseOver={() => fetchImage(url)}
      onMouseOut={() => setIsHovering(false)}
    >
      {isHovering && linkScreenshot && (
        <div className="absolute z-10 block w-32 pointer-events-none right-1/2 lg:block bottom-[2.0rem] animate-fade_in_up">
          <Image
            src={linkScreenshot}
            height={180}
            width={300}
            unoptimized
            alt={text}
            className="rounded-sm"
          />
        </div>
      )}
      <a
        href={url}
        target="_blank"
        rel="noopener noreferrer"
        className="transition-all border-underline-grow dark:ring-palevioletred"
      >
        {text}
      </a>
    </div>
  )
}

export default ScreenshotLink
Summary
Thankfully, this whole beautiful UX tidbit was actually not as difficult as I pictured it to be initially. I want to thank @raunofreiberg for the inspiration again, and all the people on Github / Stackoverflow who came before me and figured out that simply moving the Next.js API routes directory would disable Vercel's code sharing optimizations!
You will notice the first hover over a new link may take 2-3 seconds, at worst, but afterward the image should be cached for you locally, and for other visitors from the same Vercel Edge for a while!
If you have any questions or are more curious, this whole thing is implemented on this webpage obviously and its code is opensource and available at ndom91/home2021.
Update: I've come across another way to achieve this same effect. Instead of taking the screenshots dynamically at the time the user hovers on the link, which can be slow the first time when the image isn't pregenerated and cached already, this author has gone about it a bit differently and is generating the screenshots every 12 hours via a cron triggered Github Action. See their blog post for more details.
BONUS: og:image
I also used this API route to dynamically generate og:image's which are screenshots of either the homepage of my site for shares directly to the main page, or screenshots of the blog post page (including its large header image) for shares to individual posts. This can be achieved by setting a global meta tag with the path parameter set to the currently selected URL.
For example, I have a Meta.tsx component I import into my global Layout component where I like to group all the og, favicon, twitter properties, etc.
import Head from "next/head"
import { useRouter } from "next/router"

const Meta = () => {
  const router = useRouter()
  const searchParams = new URLSearchParams()
  searchParams.set("path", `https://ndo.dev${router.asPath}`)
  const fullImageURL = `https://ndo.dev/api/image?${searchParams}`

  return (
    <Head>
      <meta property="og:image" content={fullImageURL} />
      <meta property="twitter:image" content={fullImageURL} />
    </Head>
  )
}

export default Meta
